Showing posts with label homemade. Show all posts

Thursday, 6 October 2016

New Pattern Announcement: Cornish Sunset Crochet Throw

I devised this pattern some months ago, but having taught it to a group of lovely ladies at Roseland Mews last weekend, I finally had the impetus to dot the slip stitches and cross the trebles, and get the finished result listed up on ravelry. 

crochet workshop cornwall
Cornish Sunset Crochet Throw 


The colour scheme was mainly dictated by what I had in my stash at the time, but I feel it works well for the sunset theme, with a little pop of colour in the centre of each motif. 


crochet lessons cornwall
Bobbles!


The pattern is both written and charted, allowing my workshop participants to familiarise themselves with both, as well as looking at some more-advanced techniques like bobbles. 


learn to crochet cornwall
Pattern on Ravelry

Following the pattern is a great exercise in counting stitches and reading what you have done- skills which are always useful! 


crochet teacher cornwall
Crochet Throw

I can deliver this workshop on request, so if you have a crochet group or just a few friends who you want to get together for me to visit then please contact me so we can discuss it!

easy crochet blanket pattern
Hexagon Blanket

The blanket is worked in Aran-weight yarn, so it builds up quite quickly. My sample is about 3' square, but of course you can keep adding hexagons until you reach the size you want. 

learn to crochet cornwall
Lap-sized Throw

It occurred to me after the workshop that I have lots of odds and ends in Aran weight yarn, which I could collage together to make more of a random result. Because there is a lot going on in this version, I have kept the coloured centres to a single colour, and I've also left out the bobbles. 

I can make these motifs pretty much without even looking now, so this is great TV crochet for me. I'd like the result to be big enough to thrower the bed, where we have duck-egg-coloured walls... but, there's no urgency so I'll just see where this project goes. 


craft teacher cornwall
The Next Crochet Blanket

The Cornish Sky


Wednesday, 11 May 2016

Barrel Bag Sew Along Instructions: Week 2

How to make a Barrel Bag

Step 3:


Welcome back to the sew-along! 


Our next task is to make the pocket. You will remember that we have cut out two matching squares for this, one from the main fabric and one from the contrast fabric, so you'll need these. You will also need a piece of your piped cord: cut a length of about 20cm.

Decide which is to be the top edge of the pocket. If you have plain fabric this won't really matter and any edge will be just fine. 

Place your pocket squares so that they are RS facing (meaning that the fronts, or Right Sides of the fabrics are facing each other, and you can only see the backs whichever way you look). 

Quick linen from Merchant & Mills
Some fabrics are very different on the front and back,
 like the Quink linen I used from Merchant & Mills


Line the edges up carefully, then place your piece of piped cord so that the raw edges of the bias binding run along the raw edges of the fabric, as pictured below. 

Using your one-sided foot again, sew all of these layers together keeping your stitches close to the piping cord (just as you did before when sewing the cord into the binding). You will be taking roughly 1cm seam allowance. 


Piping & Pocket Pieces

Replace your normal sewing machine foot, and taking a 1cm seam allowance again, sew along the bottom edges of your pocket pieces, so that your pocket piece is a bit like a tunnel. 

Turn the pocket through, so that it is the correct way out, and press both seams so that the pocket lays nice and flat (never skimp on the pressing, it makes all the difference!)


sew a piped pocket
Completed Pocket


The pocket should now look like this one below. Trim off the extra piping cord which hangs out of the sides. 

pocket with piping cord
Pocket Ready to Attach


Bag Handles: 


Cut a piece of your webbing: it needs to be 230cm in length. 

Ensuring that it is not twisted, sew the ends together (RS together if there is a front and back) taking an allowance of 1cm, and press well so that the seam lays flat. 


Marking Out:


This next step is really important. You will need your straight edges, measuring tools and fabric markers/tailors chalk. 

Mark out your fabric (the large piece that you cut out as directed in the previous instructions) as shown in the diagram below. The drawing is not to scale. All angles are right angles, and the diagram is symmetrical. 

The long rectangles running up and down the diagram represent where you attach your webbing, and the smaller square which connects them is where you will put the pocket. The long rectangles are the same distance from both the top and the bottom of the fabric.


barrel bag diagram
Markings for Main Pattern Piece

Assembly:


Once you have made all of the markings, put your pocket piece into the correct place. Topstitch closely and carefully along the bottom edge of your pocket only. 


fabric marked with tailors chalk


Now, take the loop of webbing that you have joined, and place it onto the bag outer as shown. Make sure that the webbing seam is in the centre of your main fabric so that it will be on the bottom of the bag. 

Your handles will be the loops of fabric which hang over the body of the bag. You will only be stitching them within the long rectangular markings- not all the way to the edge of the fabric- so if you can no longer see where the stitching should end, be sure to extend your markings (take a look at the picture above to see where I've done this). 

It is critical to make sure that both of your handles are the same length: roughly 50cm. Check this now, then pin the webbing on. When the webbing is on top of the pocket piece, pin through all layers and make sure the pocket will be securely held in place. 


Webbing Ready to Sew

Top-stitch the webbing onto the bag fabric by sewing the two long rectangles that you marked. Sew close to the edge of the webbing for a really neat finish.


how to sew a barrel bag
Barrel Bag Handles Pinned On


Lesson Complete!


And that's the end of this lesson- good luck and don't forget to tag me on social media with your makes, here or here. 

Please use the contact form if you have any queries, and enjoy! 


Haberdashery & Tools


Wednesday, 4 May 2016

Barrel Bag Sew- Along Instructions: Week 1

Are you sitting comfortably? 

Then let's begin our sew-along!


How To Make a Barrel Bag
How To Make a Barrel Bag 


Step 1 was to prepare your fabrics, which is why today we are starting with:


Step 2:

Cut Out Your Pattern:


Do you remember that I mentioned a 26cm diameter plate? Well, I'm sure you will have guessed that this is for making the ends of your bag! 

Draw around your plate (or use a compass to draw a circle this size), and cut a paper pattern (no need to add any extra seam allowance, this is already included).


barrel bag pattern
26cm Circle


Fold the circle in half both horizontally and vertically, and mark quarters around the edge (e.g. 12 o'clock, 3, 6, and 9). You can use a notcher here if you have one. 


Paper Pattern with Notches


Other Pattern Pieces: 


Cut a paper square with sides measuring 19cm for the pocket pattern, and cut a paper pattern for the main body of the bag measuring 76.5cm x 52cm.

It pays to be as accurate as you can be at this stage, so it is a good idea to check that your corners are right-angles and your sides the correct length. Again there is no need to add any extra seam allowance as it is already included. 


Cut Your Fabric:


Pin the pattern pieces carefully onto your fabric and cut as follows:

• cut two circles from main fabric,
• cut one piece for the body of the bag from the main fabric (line up one of the edges with the straight of grain),
• cut one pocket square from main fabric and one pocket square from contrasting fabric (again, cut along the grain line). 


Making Bias Binding:


Taking your contrasting fabric (my Marble Indigo cotton) we are going to make some bias strips, which we will use for binding and for piping. 

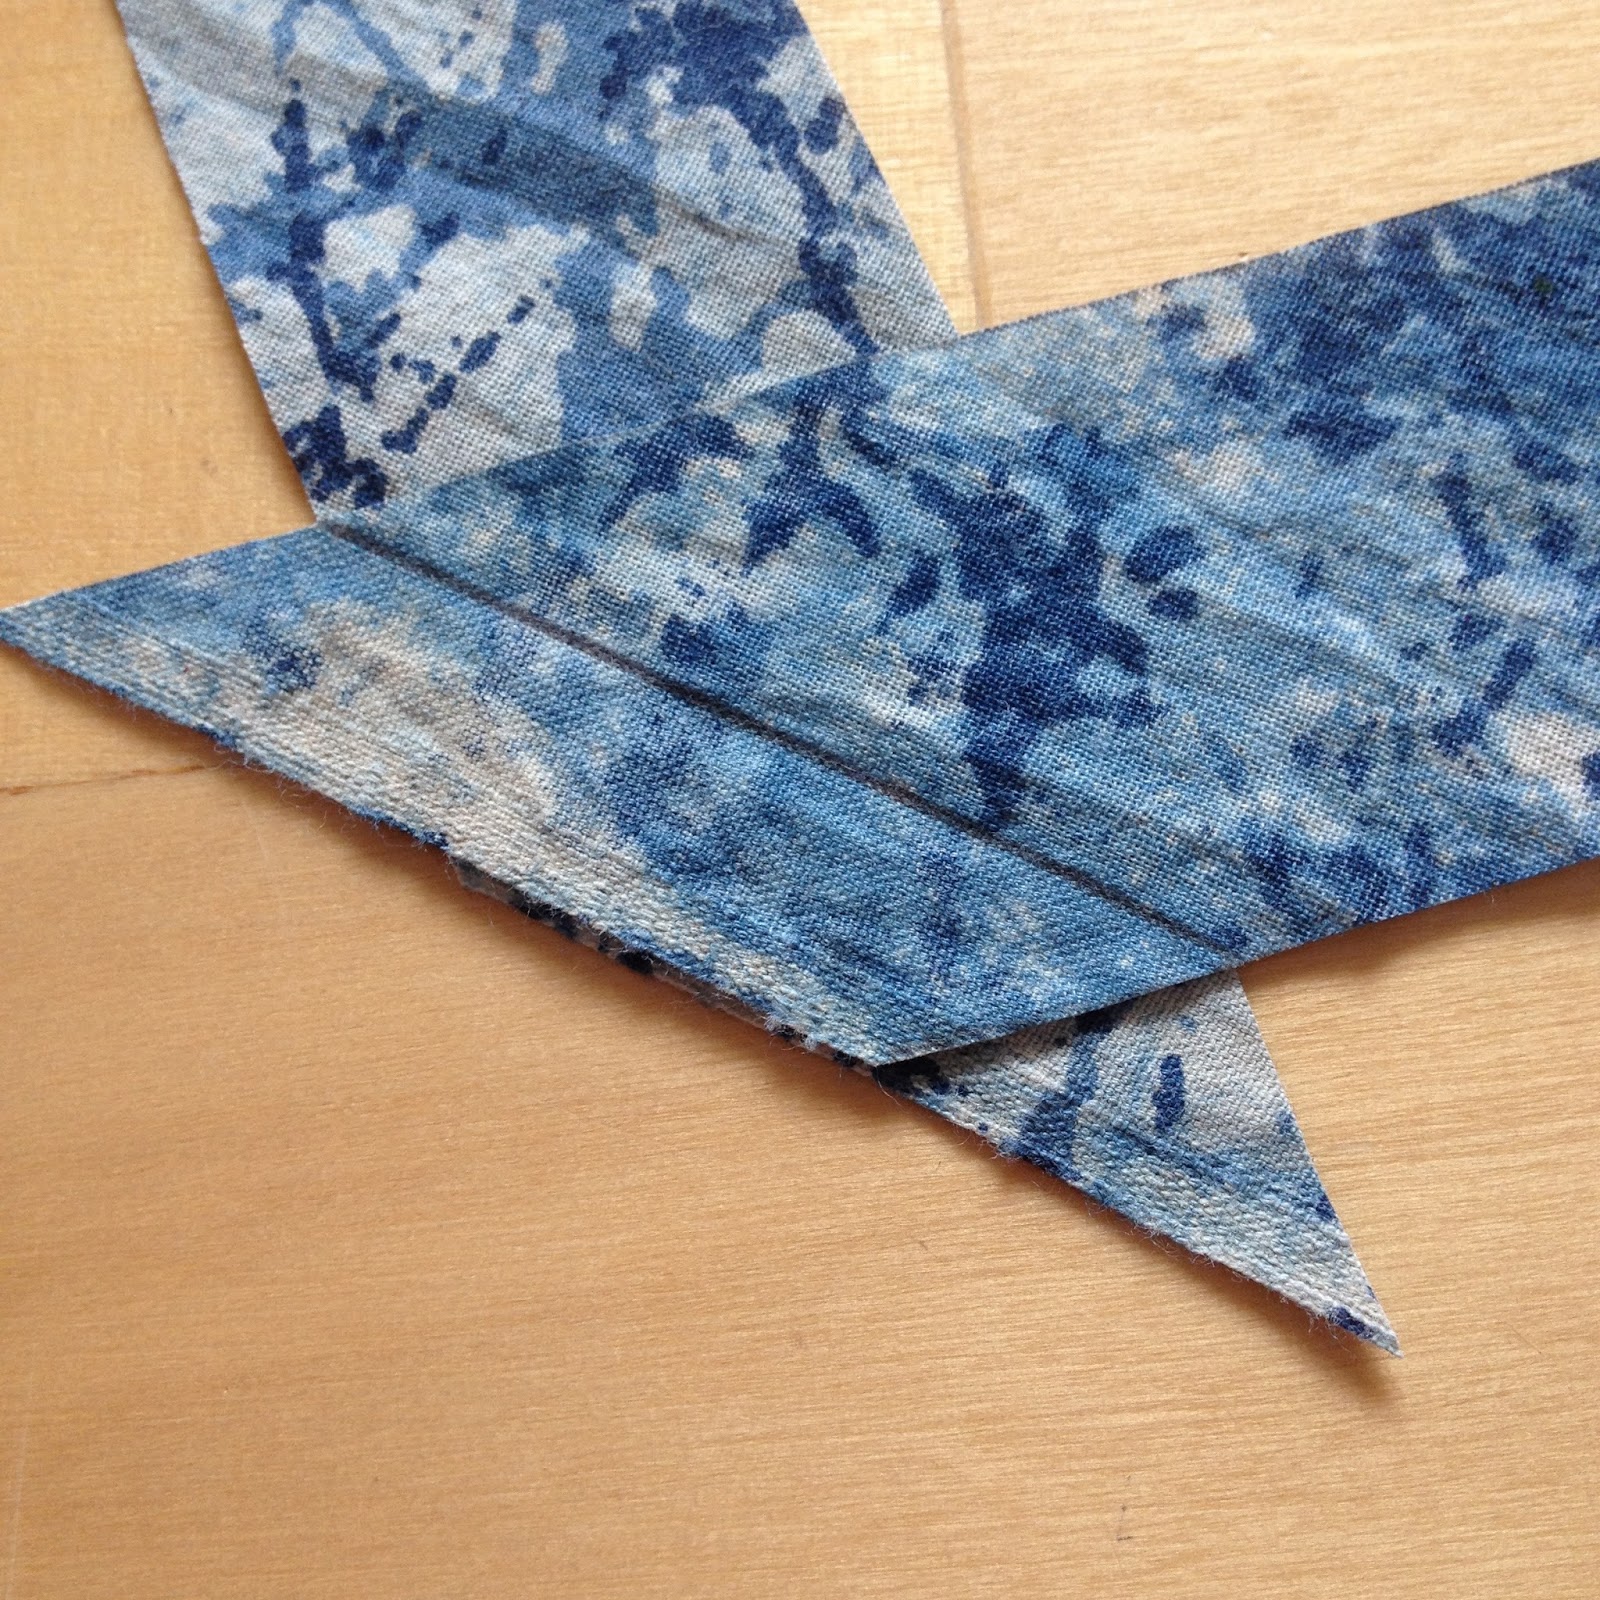
This is where your graders square (if you have one) will come into its own: line up one of the shorter sides of the triangle with the selvedge and mark down the long edge of the tool- this will be at 45˚ to the straight of grain, or the bias. Take care not to drag on the fabric as you go. 


graders square tutorial
Using Graders Square


You can then use the markings on the plastic (seen here in the bottom of the picture) to help you draw a series of lines running parallel to the first one, and draw a number of strips which run along the bias. 

If you don't have a tool like this, use a small set square to find the bias, then use it in conjunction with a long ruler to mark your strips. 

You will need roughly 2m of 4cm-wide binding, and 2m of 3cm-wide binding. Do all of your drawing before you begin to cut. 


homemade bias binding
Rolls of Bias Binding Ready to Use
notice the different widths


Cut along your lines to make strips, and join them together to make long rolls of bias binding as follows: to determine whether the ends of your strips can be joined, lay them with right sides (RS) up, and if the angles run parallel you will be able to join them.


homemade bias binding
Edges Run Parallel


Take one strip and turn it over, laying it on top of the other- now RS's face each other. 


joining bias strips
Joining Bias Strips


The stitch line will be 1cm from the raw edges, so make sure this is where the edges intersect, and that this is the point at which the right angles appear along the edges- stitch line drawn below. 


how to join bias strips
Stitch Line


Cover Your Piping Cord:


You will need to attach your one-sided foot to your sewing machine. If you're not sure what this looks like, take a look at the image below: I always think it looks like a ski. 

It will not sit in the middle of the ankle, you will have to attach it to one side- attach it so the foot it positioned to the right of the needle. 

In some machines, the position of the foot is adjusted by loosening the screw, sliding the foot to the desired position and tightening it back up. You can do this with the needle down to get a really close hold on the fabric. 


how to make piping cord tutorial
Making Piping Cord


Take your 3cm binding, and roll it around your piping cord. Take care that the raw edges of the bias binding are level with each other and that the cord runs down the centre of the bias strip. 

Using your one-sided foot as shown in the photo, sew a line of stitching running along the cord- don't stitch through the cord itself but try to keep the stitches close to it to hold it in place. 


Lesson One Done!

That is as far as we are going to go this week, I hope you enjoy it and I look forward to you sharing your progress with me on twitter and instagram. 

If you need anything to be clarified please go ahead and ask, and if you really don't do the metric system I may be persuaded to offer imperial conversions... 

#MMMay:

Are you following #mmmay on social media? Me-made May is the perfect opportunity to show off your skills, so don't forget to add this tag too to your barrel bag pictures.


Following the Instructions:

I will be putting up other blog posts between the sew-along, so don't forget that you can click on the words 'sew-along' in the word cloud to the right to see everything in this sequence. 


Saturday, 2 April 2016

New Plan: Buy Less, Buy Responsibly

Slow Fashion:

I've been harping on about slow fashion for years, since I was studying for my Fashion degree. The concept is having a bit of a zeitgeisty moment right now which I am completely behind, and it has got me really thinking again about what it means to be an ethical consumer, as well as helping me think about what I want to use my blog for. See Slow Fashion by Safia Minney as a prime example. 

Sustainability

Wikipedia tells me that "Despite the increased popularity of the use of the term "sustainability", the possibility that human societies will achieve environmental sustainability has been, and continues to be, questioned- in light of environmental degradation, climate change, overconsumption, population growth and societies' pursuit of indefinite economic growth"

So, that's cheery: we talk more about sustainability but in fact we are getting further from it. 

steppingstones Lerryn
It's a Beautiful World, lets protect it!


Why is it important?

As I see it, there are two main strands to the argument for ethical fashion. Firstly, there is the human cost: people all over the world are exploited in order to make cheap clothing. Sometimes it is working in exploitative conditions which even causes their death (remember the huge factory collapse in Bangladesh?). This is unacceptable. I totally don't buy the argument that an exploitative job is better than no job. No, what is better is a supported community, where nobody's health has to be damaged by the job that they do, children are able to receive and education, and workers are fairly paid. 

The second strand is environmental: copious amount of chemicals are used in garment production, from plant growing, to dyeing, printing and distressing fabrics. Many of these are not exactly environmentally friendly, and this is just the tip of the iceberg- for example what about the emissions used to transport all those garments that we don't even need...? What about the amount of water required to grow crops? Not to mention pesticides... 


ethical fashion
Ethical Fashion


Isn't it limiting to buy eco fashion?

Yes, in some ways it is- it is difficult to find absolutely everything you need from a responsible source. It is also more pricey. I won't say it is too expensive, as I feel we have got used to unsustainably cheap garments, and the prices asked by ethical companies are much more in line with what is fair. Higher prices are also likely to limit the amount of stuff that you acquire, and this might be a good thing as many of us have bad habits when it comes to the quantity of things we own. Another plus about a heftier price tag is that as a consumer I feel if you have more invested in an item then you are more likely to hang onto it for longer, and use it until it really does wear out. 

Having said that, there are some really exciting brands producing wonderful ethical fashion. This brings me neatly back to the subject of my blog: keep an eye out for more posts about these in future... I am going to buy ethically if at all possible from now on, and I look forward to sharing my finds with you. 

Organic Clothing Seasalt
Organic Stripes from Seasalt


Home Making:

I've long believed in the make-it-yourself ethos. I feel lucky that I have the knowledge required to make my own clothes and accessories, and this is something that I have really loved passing on to other people over the years I have been teaching. It does take a lot of time to make your own clothes, and sometimes it can be an unsatisfying process. I know I am still learning whenever I make something to wear, but when I have come up with something really successful it is thrilling, and I am proud to wear homemade often now. 

If you have never sewn a garment of knitted a jumper, let me tell you it is an eye opener: the amount of time you will have to invest may shock you. I know domestic methods are not exactly comparable with industrial processes, but even so, you might be surprised just how many seams there are in a jacket!

I know not everyone is able to make their own clothes, but if you can, I urge you to. I am planning to share some general tips, but if you are stuck on a project please consider asking me for virtual help. I am not an expert, but if I can put my education and experience into assisting you then I will. 

handmade fashion
A Hardy Handmade Skirt


But this brings me to an important question: 


Is it green to be a crafter?

I have a stash of fabrics and yarns. It isn't exactly a stock pile, but it is more than I can use in the short term. In my defence, this is from when I was designing a lot, and I did genuinely believe I was going to be able to use everything up imminently, but life happened. I know I am not alone in stashing crafting supplies. The briefest of glances through the ravelry forums will vouch for this, as will any chat with a keen crafter. 

But... surely there is the same problem with over-consumption of raw materials as there is in over-consumption of anything? I suppose it is unlikely that small children have been employed in sweat shops to make yarns in the way that they can be exploited for other industries, but can you be absolutely sure that the people who looked after the sheep for example were fairly treated by the supply chain?I know there has also been an outcry in the past over the production of angora- any industry involving animal products must naturally lead us to question the treatment of livestock. And what about fabrics? Do you know for sure what has happened along the supply chain of that pristine bolt of cotton? The answer in short is that I do not know. Some of my fabrics are made or printed in England, where I am pretty confident in the welfare of the factory workers, but what about the environmental concerns? Again, I just don't know. I'd like to look more at this, so I am on the hunt for ethical craft suppliers as I write. 

So, here is my plan: I stopped acquiring new things for intended projects some time ago, which I feel good about. And now, when I have an idea to make something I am really strict with myself about whether I can make it from the materials I already own. Then, if I really do need to get hold of something, I will try to source ethical fabrics, yarns and even threads. I'm really looking forward to sharing my discoveries in this area with you too. 

Sunday, 6 March 2016

Handmade, Homebaked and Cornish

Knitting:

sock knitting
Hello, sock!
I'm excited that this week I managed to do a little sneaky knitting: on this sock, which I started in November. I'm so close now- about half way up the toe. But, it is only the first one, so there will be its partner to make too. 

I'm using Araucania 'Ranco' yarn which is lovely to knit with, in a beautiful turquoise colour (which doesn't show up too well here I'm afraid). I find the brighter colour with minimal variegation a lot easier to work with that some other sock yarns I've tried. Plus of course my trusty Knit Pro dpn's. The turquoise looks like it has sold out everywhere, but here is a link to some other colours, available at a discount on Black Sheep Wools.

Cornwall:

St Michael's Mount, Marazion, Cornwall
St Michael's Mount
The highlight of my Cornish week was probably this trip to Mount's Bay. There is such a draw to the beautiful mount itself, and the approach around the bay is so full of admiration and anticipation. It really is such a privilege to live in Cornwall!

Baking:

I had prepared an epic picnic, which we were all glad of by the time that we got close to the mount. I included a Saffron & Seed Cake (which I thought was a nice twist on Cornish saffron buns), and I'm delighted that I can share the recipe from Asda here. 

More Cornwall:

But living in this stunning part of the world we are spoilt for beautiful views and exciting skies, so here are another couple of snaps from earlier in the week when a dramatic hailstorm swept in and then out again early one morning. 


The Gribbin, St Austell Bay, Cornwall
Hail Storm Over The Gribbin

Charlestown Cornwall
Quayside Architecture

Crochet:

And finally, you may remember my crochet bedspread, the one which took me a whole year in between other projects to finish (it is 4-ply after all!)... well, I thought I'd share a snap of it in its new Cornish home. You can see its humble beginnings right back in this old post: here. 


crochet bedspread Cornish bedroom
My Happy Place! 

Sunday, 17 January 2016

Busy Bee


I wanted to share with you a recent sample that I am developing into a throw. Inspired by the Cornish sunset, this is going to be both a design in my ravelry store, and form the basis of a workshop in October. I just love how the star-shapes are formed where the hexagons meet, and the contrast of bright orange with grey... there's always something so exciting about a new design.

There will soon be a link to the workshop on the right, but if you simply cannot wait for details please do get in touch. 


I have decided that Sunday is my new blogging day. Our Sunday routine is to do the housework, visit the local boot fair, then sometimes I go to yoga, and whatever else we get up to is interjected with coffee breaks and quiet time... it seems like the perfect day for reflection. 


If you are enjoying these pictures of the amazing Cornish scenery then you might like to follow me on instagram for more: my username is StitchingPixie. Do say hello! 


Monday, 11 January 2016

Crafty Cornwall


I'm delighted to be thinking about my blog again!

There are so many hours to be whiled away just looking at the sea (before touching on any of the other wonders of this beautiful place) that having much of an online life has slipped down the list.

I am hoping to bring you news very soon about some craft classes in Cornwall, too.

I have been doing some teaching, but it has been concentrated at the big trade shows. Now that the year has turned, though, I am ready to think about getting back to it. If you have any requests for crochet/knitting/sewing classes, do let me know as I am very open to locations and topics at this stage.

Project-wise I am a little stuck on my Cornish guernsey- it is a much larger project that I had really thought about, and the tiny needles require good daylight. I am almost up to the point where I can join at the shoulders, and then I will consider myself roughly halfway through.  Pictures to follow...