Showing posts with label barrel bag. Show all posts

Wednesday, 1 June 2016

Barrel Bag Sew Along Instructions: Week 5

The final step is here! Well done if you've been keeping up with the sew along, and thank you so much for taking part. I have really enjoyed seeing your bags come together. 

Don't worry if you are worried about losing your place in the instructions: I am planning to archive them all in one spot so that they are easy to find for future reference.  

how to make a bag
barrel bag


Finishing Touches:


Seam Finishing: 


The next thing you need to do after last week is finish the inside of your round seams: I have bound mine using the 4cm bias binding. It is a professional and also pretty finish to have on the inside of your bag. If you want to request a tutorial in how to bind seams please go ahead and use the contact form. 

Or, you can overlock the raw edges together- it is quicker and also very strong. 


Making the Strap:


Cut 2 x 10cm lengths of webbing, and also 2 x 7cm lengths. Then, have a look at your remaining webbing and decide how long you would like your shoulder strap to be. 

Don't forget that the buckles themselves will contribute to the length, and you should also allow about 3cm for the loop of webbing used to attach them (see picture below)- the overall length of buckle plus webbing loop is about 7.5cm each end of the strap. 

how to make a barrel bag
bag strap detail

You also need to add 1cm seam allowance each end of your strap. 

Once you are satisfied that you have identified the correct length of webbing, cut the strap to length. 


Take a 10cm piece of webbing, fold in half long ways and topstitch. Thread this loop through your buckle, then sew the loop closed. 

bag instructions

Place this loop onto a shorter 7cm piece of webbing and sew them together near the top. Make sure the buckle has its opening side facing down as pictured. The webbing loop should overhang by about 1cm: this is to stagger the bulk of the seam and also to ensure the rivets will go through it.


merchant & mills sew along

Then, place the strap onto the buckle to sandwich it into place, and sew, taking a 1cm seam allowance from the strap and the 7cm webbing. 

barrel bag tutorial

learn to sew a bag


Now, press this seam so that it lays flat, and press the raw edge of the 7cm webbing, turning 1cm over. 

Topstitch around the sides and top of this shorter piece, attaching it to the main strap. 


make a strap with buckle

sewing instructions

Repeat this process for the other end of the strap. 

Now, making small pilot holes with an awl or a sharp pair of scissors, hammer the rivets into place, arranging them as you like, but preferably add strength by holding all of these layers of webbing together. 


The last step:


One (optional) finishing touch is to sew your handles together longways for strength and ease of use: find the midpoint at the top of you handles, then measure and mark 10cm either side of this. 

Fold your webbing in half along this 20cm, and sewing close to the edges topstitch both sides together. 


merchant & mills linen bag
love that 'Quink' linen

And you're done! 

Well done and thank you again for joining in the sew along. Don't forget to keep tagging me in your finished results on twitter and instagram!

With thanks once again to Merchant & Mills for kindly supplying the materials for this project. 

home sewing bag tutorial
barrel bag from Merchant & Mills materials

Wednesday, 25 May 2016

Barrel Bag Sew Along Instruction: Week 4

Sew Along: Week 4

Welcome back! This week is an exciting one- your bag will really begin to take shape! 

how to make a barrel bag
barrel bag sew along


You will need to have your D rings handy.

Let's go!


Cut a 20cm piece of your webbing. Fold it in half down the length of it and topstitch the long edges neatly together (from the right sides). Now cut this into two, so that you have two pieces measuring 10cm each. 

Fold one piece in half, place the D ring into the fold and stay stitch the ends together, so that your D ring is secured into a loop of webbing. Repeat this step for the other D ring and piece of webbing. 


merchant & mills haberdashery
Merchant & Mills Hardware 

Bag Ends: 


Now, take both of your round bag ends, and mark the quarters around them that you notched into your pattern way back at the beginning. I don't like to mark these points too soon because when you are using chalk they often rub off anyway. 

Also on the body of your bag mark the point on the fabric which is directly opposite the zip seam, and also the points which are exactly half way between the top and bottom of the bag.


bag sew along instructions
notches are important

tutorial, instructions, how to
...marked with chalk


Now, attach your one-sided foot to the machine and locate your piping cord.


Lining up all of the raw edges, place your piping cord onto the round bag end and sew thus: you should have a 1cm seam allowance. It is important that the start and end of your cord should overlap as shown in the pictures so that there will be no gaps in the cord, so make sure you have a little spare at the beginning and end. When you come to the end of the circle, sew actually through the cord to secure it into this overlapped position. 


how to sew a piped seam
Piping attached to one bag end


piped seam tutorial
piping must overlap at the beginning and end


Re-mark your quarter points if necessary. 

Pin your loops with their D rings so that they will sit at the top of the bag. Be sure that the rings point towards the centre of the circle, so that they will be on the outside of the bag when it is turned through. 

Now, lining up all of your guide points carefully, pin the body of your bag onto the bag ends (RS together), and still with your one-sided foot sew around the circle in exactly the same way as before. Take a 1cm seam allowance- the aim is to sew in exactly the same place when you attached the piping.

Ensure that your zip is open (crucial but easy to overlook!), before repeating these steps for the opposite end of the bag. 


barrel bag with piping instructions
piping is a beautiful visual detail on the bag

Join me next week for the final instalment of instructions, with details of how to finish your bag to a beautiful standard. 

Once again, thank you for tagging me on twitter or instagram. Please keep doing this- it's great seeing how you are getting on, and don't forget you can always use the contact form if you need clarification. 

Thank you for taking part!


Tuesday, 17 May 2016

Barrel Bag Sew Along Instructions: Week 3

Sew Along: Week 3


barrel bag tutorial
Barrel Bag 

This week your bag will really begin to take shape! We will be inserting the zip. 

I would first just like to point out that, shockingly, I forgot to do what I am about to instruct you to do! Apologies in advance for this, I just got too excited! 

Next Step:


It is necessary to finish the raw edges where the zip will be inserted. These are the edges of your main fabric which measure 52cm. 

By 'finish' I simply mean that we cannot leave the fabric with the raw edges it has at the moment because it will fray. You can either

- overlock these edges,
- run a zig zag stitch along them,
-or, bind them with bias binding.

You have a 1.5cm seam allowance here, so make sure whatever finish you use stays within this distance of the edge of the fabric. 


The Zip:


Don't be afraid of the zip! We are going to topstitch it in place. Your zip should be about 45cm/18".

Place your now-finished edges together and line them up as if you are going to sew down them, joining them, with the RS's of your bag together. Be sure to keep the handles out of the way. 

Taking a 1.5cm seam allowance, sew about 5cm down the edges, then stop, backpacking securely. Turn the bag around and do the same at the other end. 

how to sew a zip
tack in a contrasting colour


Use chalk or a fabric marker to draw a line 1.5cm from the edges running along the rest off this edge we are working on. 

Then, preferable in a contrasting colour, make a neat line or tacking stitches along the line you have drawn. Make these stitches as straight as possible. 


inserting zip
seam pressed open


Press this seam open, along the whole length of the machine stitches and tacking stitches. A long thin sleeve board is useful here if you have one. 


Next, pin and tack your zip into place, so that the teeth are carefully positioned where the bag will open (under your contrasting tacking stitches).

For sewing in the zip, you can use your one-sided foot. However, when I have bulky fabric I often like to use my walking foot for sewing in zips. This helps to prevent the puckering that sometimes happens.


sewing machine walking foot
walking foot


Making sure your needle will not hit the zipper teeth (this will most likely break it), and starting with the zip closed, sew in a neat box down one side of the zip, across the end if you can, and up the other side and the opposite end. You will need to move the zip handle a little as you get to the end of your box- leave the needle down through the fabric so as not to interrupt your line of stitching. 

Remove the rest of your contrasting tacking (you will most likely have had to remove a little already in order to sew the box all around your zip). This is where the contrasting colour is really useful: you know easily that these stitches can be removed. 

Also remove the tacking that held your zip in place as this is no longer needed. 

Open your zip- both to check that it all works, and in preparation for the next step!

Well done! 


sew zip bag instructions
barrel bag with zip


Thank you if you have tagged me on social media (here or here) to let me know how you're getting on. I love seeing all of your fabric choices. And don't forget, if you need any clarification just use the contact form to the right and I will try to explain anything that might seem confusing. 


Wednesday, 11 May 2016

Barrel Bag Sew Along Instructions: Week 2

How to make a Barrel Bag

Step 3:


Welcome back to the sew-along! 


Our next task is to make the pocket. You will remember that we have cut out two matching squares for this, one from the main fabric and one from the contrast fabric, so you'll need these. You will also need a piece of your piped cord: cut a length of about 20cm.

Decide which is to be the top edge of the pocket. If you have plain fabric this won't really matter and any edge will be just fine. 

Place your pocket squares so that they are RS facing (meaning that the fronts, or Right Sides of the fabrics are facing each other, and you can only see the backs whichever way you look). 

Quick linen from Merchant & Mills
Some fabrics are very different on the front and back,
 like the Quink linen I used from Merchant & Mills


Line the edges up carefully, then place your piece of piped cord so that the raw edges of the bias binding run along the raw edges of the fabric, as pictured below. 

Using your one-sided foot again, sew all of these layers together keeping your stitches close to the piping cord (just as you did before when sewing the cord into the binding). You will be taking roughly 1cm seam allowance. 


Piping & Pocket Pieces

Replace your normal sewing machine foot, and taking a 1cm seam allowance again, sew along the bottom edges of your pocket pieces, so that your pocket piece is a bit like a tunnel. 

Turn the pocket through, so that it is the correct way out, and press both seams so that the pocket lays nice and flat (never skimp on the pressing, it makes all the difference!)


sew a piped pocket
Completed Pocket


The pocket should now look like this one below. Trim off the extra piping cord which hangs out of the sides. 

pocket with piping cord
Pocket Ready to Attach


Bag Handles: 


Cut a piece of your webbing: it needs to be 230cm in length. 

Ensuring that it is not twisted, sew the ends together (RS together if there is a front and back) taking an allowance of 1cm, and press well so that the seam lays flat. 


Marking Out:


This next step is really important. You will need your straight edges, measuring tools and fabric markers/tailors chalk. 

Mark out your fabric (the large piece that you cut out as directed in the previous instructions) as shown in the diagram below. The drawing is not to scale. All angles are right angles, and the diagram is symmetrical. 

The long rectangles running up and down the diagram represent where you attach your webbing, and the smaller square which connects them is where you will put the pocket. The long rectangles are the same distance from both the top and the bottom of the fabric.


barrel bag diagram
Markings for Main Pattern Piece

Assembly:


Once you have made all of the markings, put your pocket piece into the correct place. Topstitch closely and carefully along the bottom edge of your pocket only. 


fabric marked with tailors chalk


Now, take the loop of webbing that you have joined, and place it onto the bag outer as shown. Make sure that the webbing seam is in the centre of your main fabric so that it will be on the bottom of the bag. 

Your handles will be the loops of fabric which hang over the body of the bag. You will only be stitching them within the long rectangular markings- not all the way to the edge of the fabric- so if you can no longer see where the stitching should end, be sure to extend your markings (take a look at the picture above to see where I've done this). 

It is critical to make sure that both of your handles are the same length: roughly 50cm. Check this now, then pin the webbing on. When the webbing is on top of the pocket piece, pin through all layers and make sure the pocket will be securely held in place. 


Webbing Ready to Sew

Top-stitch the webbing onto the bag fabric by sewing the two long rectangles that you marked. Sew close to the edge of the webbing for a really neat finish.


how to sew a barrel bag
Barrel Bag Handles Pinned On


Lesson Complete!


And that's the end of this lesson- good luck and don't forget to tag me on social media with your makes, here or here

Please use the contact form if you have any queries, and enjoy! 


Haberdashery & Tools


Wednesday, 4 May 2016

Barrel Bag Sew- Along Instructions: Week 1

Are you sitting comfortably? 

Then let's begin our sew-along!


How To Make a Barrel Bag
How To Make a Barrel Bag 


Step 1 was to prepare your fabrics, which is why today we are starting with:


Step 2:

Cut Out Your Pattern:


Do you remember that I mentioned a 26cm diameter plate? Well, I'm sure you will have guessed that this is for making the ends of your bag! 

Draw around your plate (or use a compass to draw a circle this size), and cut a paper pattern (no need to add any extra seam allowance, this is already included).


barrel bag pattern
26cm Circle


Fold the circle in half both horizontally and vertically, and mark quarters around the edge (e.g. 12 o'clock, 3, 6, and 9). You can use a notcher here if you have one. 


Paper Pattern with Notches


Other Pattern Pieces: 


Cut a paper square with sides measuring 19cm for the pocket pattern, and cut a paper pattern for the main body of the bag measuring 76.5cm x 52cm.

It pays to be as accurate as you can be at this stage, so it is a good idea to check that your corners are right-angles and your sides the correct length. Again there is no need to add any extra seam allowance as it is already included. 


Cut Your Fabric:


Pin the pattern pieces carefully onto your fabric and cut as follows:

• cut two circles from main fabric,
• cut one piece for the body of the bag from the main fabric (line up one of the edges with the straight of grain),
• cut one pocket square from main fabric and one pocket square from contrasting fabric (again, cut along the grain line). 


Making Bias Binding:


Taking your contrasting fabric (my Marble Indigo cotton) we are going to make some bias strips, which we will use for binding and for piping. 

This is where your graders square (if you have one) will come into its own: line up one of the shorter sides of the triangle with the selvedge and mark down the long edge of the tool- this will be at 45˚ to the straight of grain, or the bias. Take care not to drag on the fabric as you go. 


graders square tutorial
Using Graders Square


You can then use the markings on the plastic (seen here in the bottom of the picture) to help you draw a series of lines running parallel to the first one, and draw a number of strips which run along the bias. 

If you don't have a tool like this, use a small set square to find the bias, then use it in conjunction with a long ruler to mark your strips. 

You will need roughly 2m of 4cm-wide binding, and 2m of 3cm-wide binding. Do all of your drawing before you begin to cut. 


homemade bias binding
Rolls of Bias Binding Ready to Use
notice the different widths


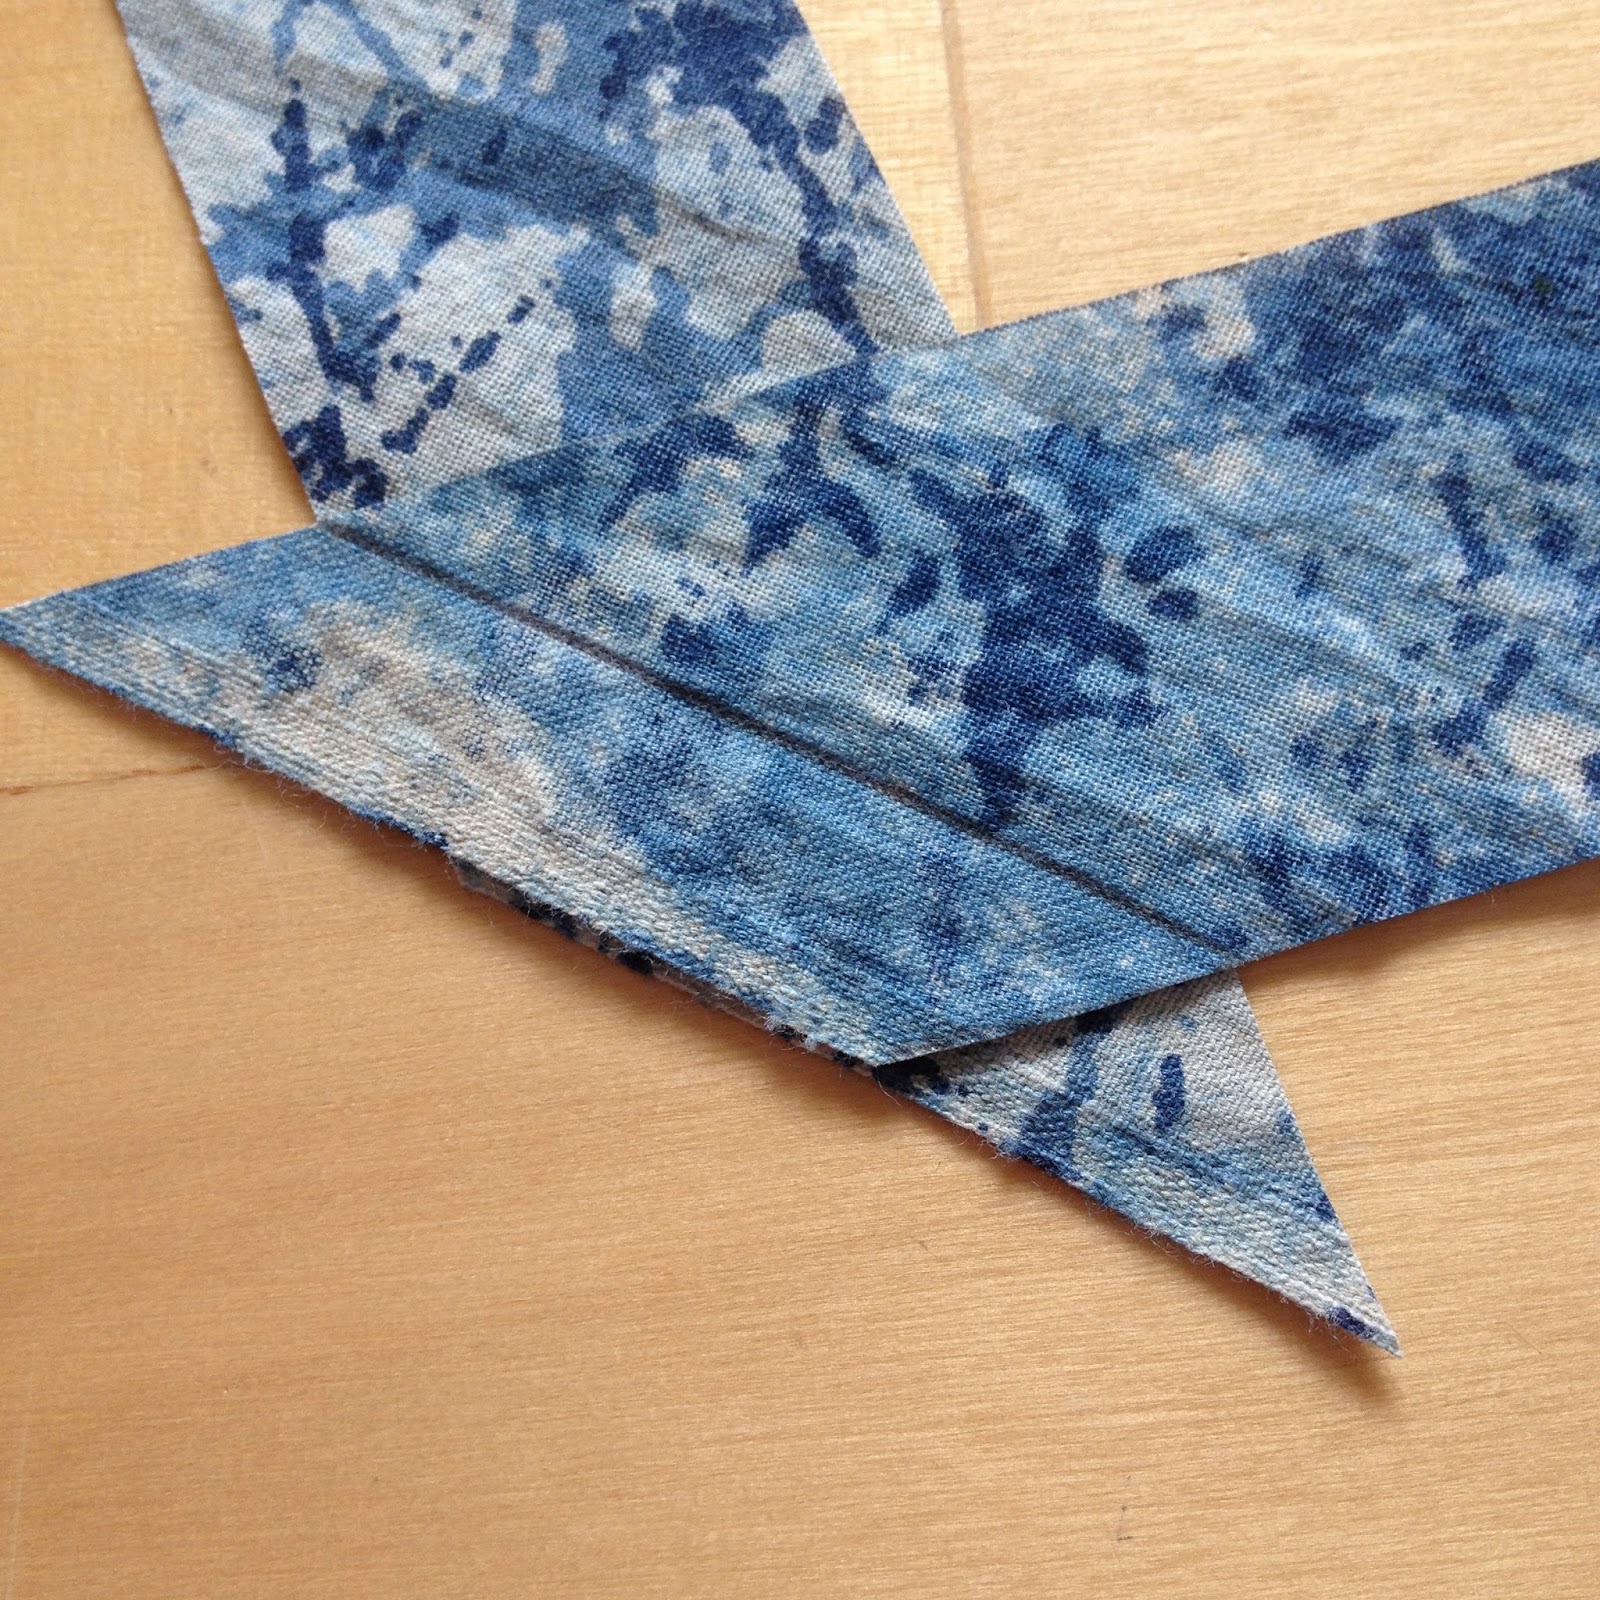
Cut along your lines to make strips, and join them together to make long rolls of bias binding as follows: to determine whether the ends of your strips can be joined, lay them with right sides (RS) up, and if the angles run parallel you will be able to join them.


homemade bias binding
Edges Run Parallel


Take one strip and turn it over, laying it on top of the other- now RS's face each other. 


joining bias strips
Joining Bias Strips


The stitch line will be 1cm from the raw edges, so make sure this is where the edges intersect, and that this is the point at which the right angles appear along the edges- stitch line drawn below. 


how to join bias strips
Stitch Line


Cover Your Piping Cord:


You will need to attach your one-sided foot to your sewing machine. If you're not sure what this looks like, take a look at the image below: I always think it looks like a ski. 

It will not sit in the middle of the ankle, you will have to attach it to one side- attach it so the foot it positioned to the right of the needle. 

In some machines, the position of the foot is adjusted by loosening the screw, sliding the foot to the desired position and tightening it back up. You can do this with the needle down to get a really close hold on the fabric. 


how to make piping cord tutorial
Making Piping Cord


Take your 3cm binding, and roll it around your piping cord. Take care that the raw edges of the bias binding are level with each other and that the cord runs down the centre of the bias strip. 

Using your one-sided foot as shown in the photo, sew a line of stitching running along the cord- don't stitch through the cord itself but try to keep the stitches close to it to hold it in place. 


Lesson One Done!

That is as far as we are going to go this week, I hope you enjoy it and I look forward to you sharing your progress with me on twitter and instagram

If you need anything to be clarified please go ahead and ask, and if you really don't do the metric system I may be persuaded to offer imperial conversions... 

#MMMay:

Are you following #mmmay on social media? Me-made May is the perfect opportunity to show off your skills, so don't forget to add this tag too to your barrel bag pictures.


Following the Instructions:

I will be putting up other blog posts between the sew-along, so don't forget that you can click on the words 'sew-along' in the word cloud to the right to see everything in this sequence. 


Wednesday, 27 April 2016

Announcing The Barrel Bag Sew-Along, with Merchant & Mills

sewing tutorial
sewing instructions


Announcing the Sew-Along:


I am delighted to announce that I am hosting a sew-along, sponsored by Merchant & Mills.

How it works: 


Each Wednesday I will upload a set of clear instructions for you to complete at your leisure to take you through every detail of how to make your very own barrel bag, in small manageable stages.

barrel bag sew-along
The Sew-Along

About the Bag: 


I love the preppy style of barrel bags, but I wanted to soften it a little. The relaxed and slightly slouchy result is perfect for me to use as a gym bag: it is quite capacious but with a proper fastening, and I can either throw it over my shoulder or grab the handles to rummage through the contents. 

I hope I've come up with something that will be equally useful to you, be it for a day out, an alternative to your handbag, an overnighter, for school or college... or whatever you choose. A barrel bag is also gender neutral, so this could be a great make for a man. 

How to make a barrel bag


I'm waiting a week before I launch in with instructions to allow you to gather your materials and equipment. 

Merchant & Mills:


If you've never encountered Merchant & Mills at their shop, or selling elsewhere then you have missed out! Their website is perfectly lovely, and tells you pretty much everything you need to know, but there is nothing quite like seeing the colours of all of those beautiful fabrics in the flesh and engaging with their really tactile properties. Yes, dear readers, I have spent some considerable time loitering, planning projects, and, um, shopping!

posh haberdashery
what's in this beautiful package?!

Therefore, I am thrilled that they have supported this sew-along by providing my fabrics, hardware, and webbing. Thank you so much to Carolyn, and also to Michelle. 

I strongly recommend that you order your fabrics and hardware from their website, or pop down to their shop in Rye, East Sussex, if you can.


What You Need to Make a Barrel Bag:


Fabrics:


It took me (somewhat characteristically) a long time to decide which fabrics to plump for, but for my main fabric I chose Quink linen: it is substantial and yet soft, and I love the way has amazing depth of colour, and yet antiques with use. It is also beautiful on the 'wrong' side, which means the inner of my bag is as beautiful as the outer (I made use of this contrast on the pocket). You will need one metre.

For the contrasting fabric I went for an Indian cotton, in marbled indigo. I have used these Indian cottons before, so I knew that they handle really well and have a nice dry sort of feel. 

The straps are vital to this bag, so I suggest that you don't scrimp on your webbing. You will need four metres, which seems huge I know, but I promise you it is important. I went for 50mm blue grosgrain

You'll also need two metres of fine piping cord (approximately 2mm diameter), plus matching cotton sewing thread. I used Guttermann shade 5412 which is a perfect match.


Merchant & Mills fabrics
'Quink' linen, Indian cotton, 5mm grosgrain

Hardware:


A beautiful bag deserves top quality hardware!

You will need a zip. I went for a chunky metal one, measuring 45cm long.

To make this bag you will need two D rings, two paraclips & four rivets

brass fittings from Merchant & Mills
beautiful hardware

Tools:


You will need a sewing machine with a good sharp needle, plus a one-sided foot. 

You'll need your general sewing kit (hand needles, pins etc). 


sewing essentials
sewing kit


Also on the list of essentials are good fabric scissors, drawing tools for both paper and fabric and pattern paper, (unless you want to work straight onto the fabric, in which case good fabric markers will do), including a long straight edge. 


fabric pans
Pilot 'Frixion' pens: my favourite for fabric marking as they iron off easily


A grader's square is extremely useful, as is a 26cm diameter plate. 


http://www.eastmanstaples.co/index.php/metric-graders-square.html
grader's square


For attaching the rivets: a hammer and an awl.


Skills: 


This sew-along will suit an adventurous beginner or someone who has intermediate skills. We will be putting a zip in, sewing curves and using bias binding (which I will explain in full). The really make-or-break skill is careful marking out though, for which no experience is necessary. 


How to Make a Barrel Bag:


Step 1: Preparation

Wash your fabric as per the instructions, and lay flat to dry, or hang from the selvedge on the line. Give them a careful press. 

equipment to make barrel bag
26cm dinner plate

Sew-Along With Me: 


So, I hope you will join me next week for the first set of instructions in the sew-along. As I mentioned, each Wednesday the next instalment will be uploaded. You could consider subscribing to ensure that you don't miss any stages. 

I always welcome your comments, and if you get really stuck or you want to request further tutorials then please go ahead and use the contact form on the right. 

Also, I'd really love it if you tag me on instagram @stitchingfitpixie or twitter @StAustellStitch at every stage of your make: show me your fabrics and how you're getting on!


http://merchantandmills.com
Amazing giant protractor also purchased at Merchant & Mills